MUST READ ARTICLES
Read the following article links below. From each article pull out FIVE pieces of information that you found noteworthy. Finish all five articles and put them onto your weebly site, under links
Due: Monday 1/24/20 : Article Facts Worksheet
Photograpy vocabulary, due by Tuesday 1/24/20
WEEBLY PAGE- First things first
Set up your personal Weebly page. Go to Weebly.com and follow the directions to start your own photography web page.
Your home page must include the following as tabs, as well as the appropriate information:
Home- FIVE tabs created and at least 3 pictures that represent you or your photographs.
Also, add at least one quote to your homepage that has some meaning to you. If someone said it, be sure to give them credit.
Contacts- At minimum an email address to contact you
About- Paragraph written about your who you are, what you do, and your thoughts on photography
Projects-Nothing yet, but you will upload projects here as they are due
Links - Create a minimum of FIVE links dealing with photography. Sites with beautiful pictures, information about photography, or famous photographers can be used.
BE SURE TO "PUBLISH" WHEN COMPLETE
LESSONS
1. Bio Poem in pictures- Each student will produce a bio poem in pictures following the proper format. Rather than using words to describe themselves, pictures taken BY students will be used for each line of the bio poem.
DUE: Monday 1/31/20
1. Bio Poem in pictures- Each student will produce a bio poem in pictures following the proper format. Rather than using words to describe themselves, pictures taken BY students will be used for each line of the bio poem.
DUE: Monday 1/31/20
| bio_peom_example.docx |
| bio_poem_layout.png |
| biopeom-pic-example_orig.png |
2. "Words/letters" photo scavenger hunt - In this lesson, students begin by selecting a word, name, or the alphabet. They are not allowed to photograph pre-made letters, but must find letters by searching in unique locations with interesting shapes and angles (crossed picnic table legs could be an "X"). Putting the individual images can be displayed side-by-side as one image to spell out the word. This has become very popular at Street Fairs.
After scouring around town for your letters and putting them on your site, please give a brief explanation of where the letters were discovered.
DUE:
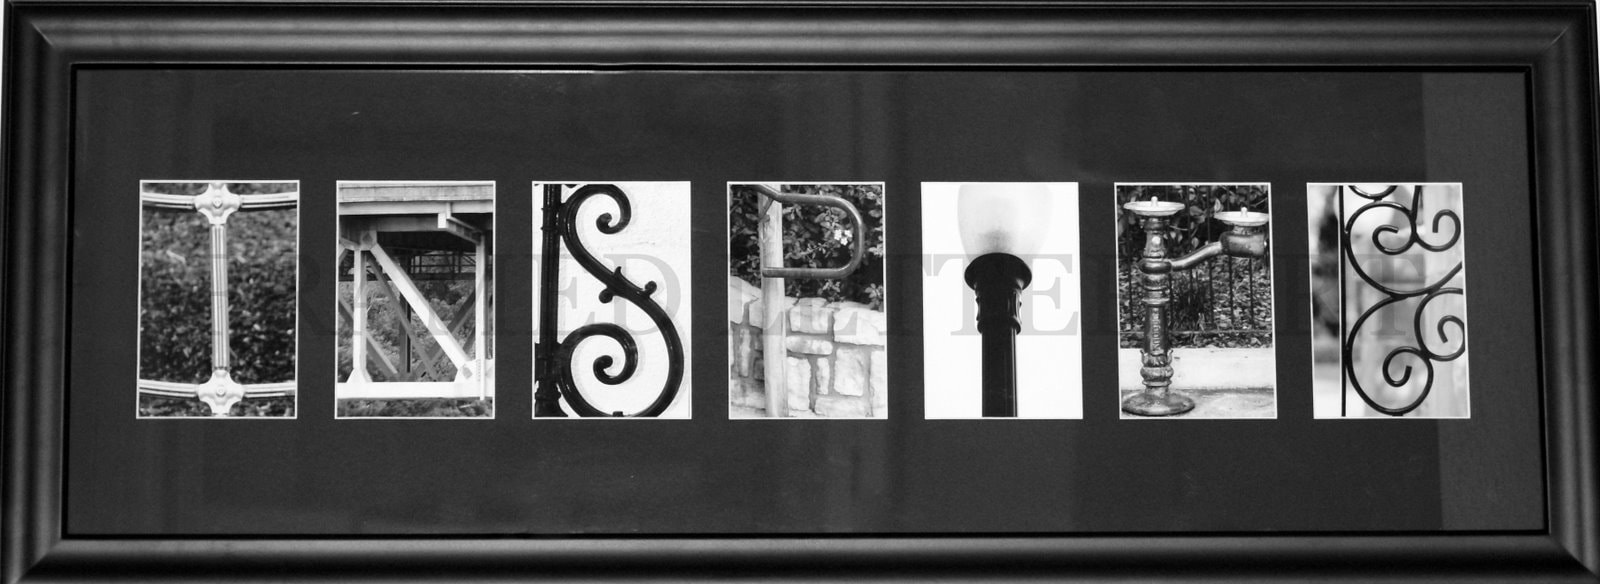
This is a useful site to use to combine your letters together as one. Create a collage and put your letters side by side.
Create a GIF using your letters for your word and put it somewhere on your page that has this project on it. Use the following site to create your GIF:
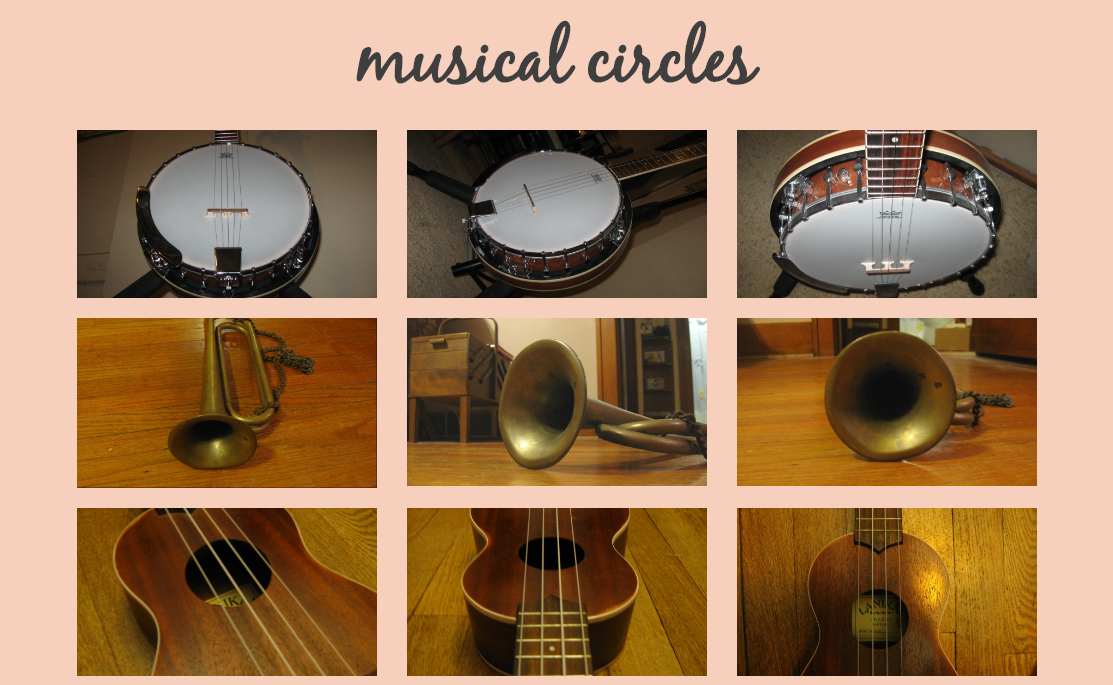
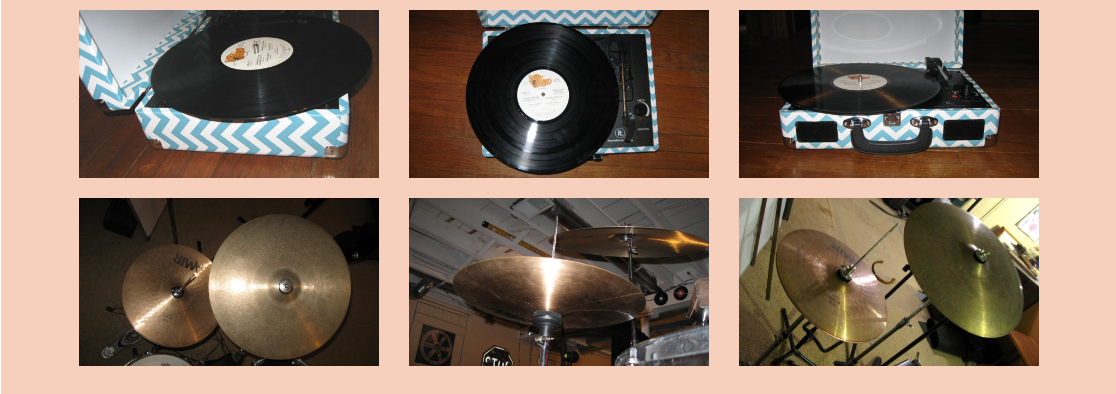
3. "Shape" photo scavenger hunt - First, click on each button and link below, read the articles and/or the information provided. Each student chooses a basic shape (circle, square, etc.), then searches for their shape with unique angles and in non-traditional locations (a circle found by photographing the bottom of a tipped-over bottle, etc.). A student's best images can be manipulated to a chosen color scheme, then printed and displayed together as one complete image. Refer to rubric for more details.
Due:
Read the following two articles and the PDF, and answer the questions about the articles that is provided.
4. "20 photography tips" lesson - After discussing good photography tips and techniques (composition, perspective, the Rule of Thirds, framing, movement, lighting, etc.) in the two articles below , students must take TEN different photographs containing TEN photography tips or techniques. There are 20 choices, but only 10 need to be selected. Students will take a photograph that successfully demonstrates the use of each of the 10 tips.
On your website, above your picture, identify what technique you are using.
On your website, above your picture, identify what technique you are using.
Due:
5. Ten Portraits- Create a series of 10 portraits of a family member, friend or classmate, each showing a unique perspective. Use a variety of techniques in this portrait series, such as a view from above, a view from below, a partially obscured portrait, etc.
The following techniques must be in your project:
1. Rule of Thirds- Refer to this PowerPoint
2. Fill the frame
3. Series of shots (5 photos)
-You are free to choose the other 7 techniques
The following techniques must be in your project:
1. Rule of Thirds- Refer to this PowerPoint
2. Fill the frame
3. Series of shots (5 photos)
-You are free to choose the other 7 techniques
Due:
5. Exposure Simulator
This site will help you understand exposure. It allows you to select various lighting conditions, ISO, shutter speed, and aperture settings.
Spend some time on the site. After selecting several different combinations of ISO, shutter speed and aperture settings, WRITE A SHORT EXPLANATION OF YOUR FINDINGS ALONG WITH AT LEAST 3 PICTURES TO HELP SUPPORT YOUR FINDINGS. Place your final product in your google drive.
Exposure Simulator II
Do the same thing on this site as you did on the one above. Adjust the Aperture/ Shutter/ ISO to take the perfect picture and get a feel for what happens when each is adjusted.
Take one picture of each of the THREE different scenes (Dogs, Tree, Water). Use the Print Screen button to capture the image and put it onto Word with an explanation of how you captured the image. Do this for all three. Submit to google drive when completed.
****October 6th, 2016**** (Outside)
TEN Shots- Walk around the outside of the high school and capture ten images that represent the day.
Capture photographs using the following when techniques:
-Rule of thirds
-Lighting
-Perspective
-Depth of Field
-Framing
-Fill the frame
-Lines
-Angles
-Texture
After shooting, upload 10 of your best shots to your Weebly page labeled with the technique and title it October 6th, 2016.
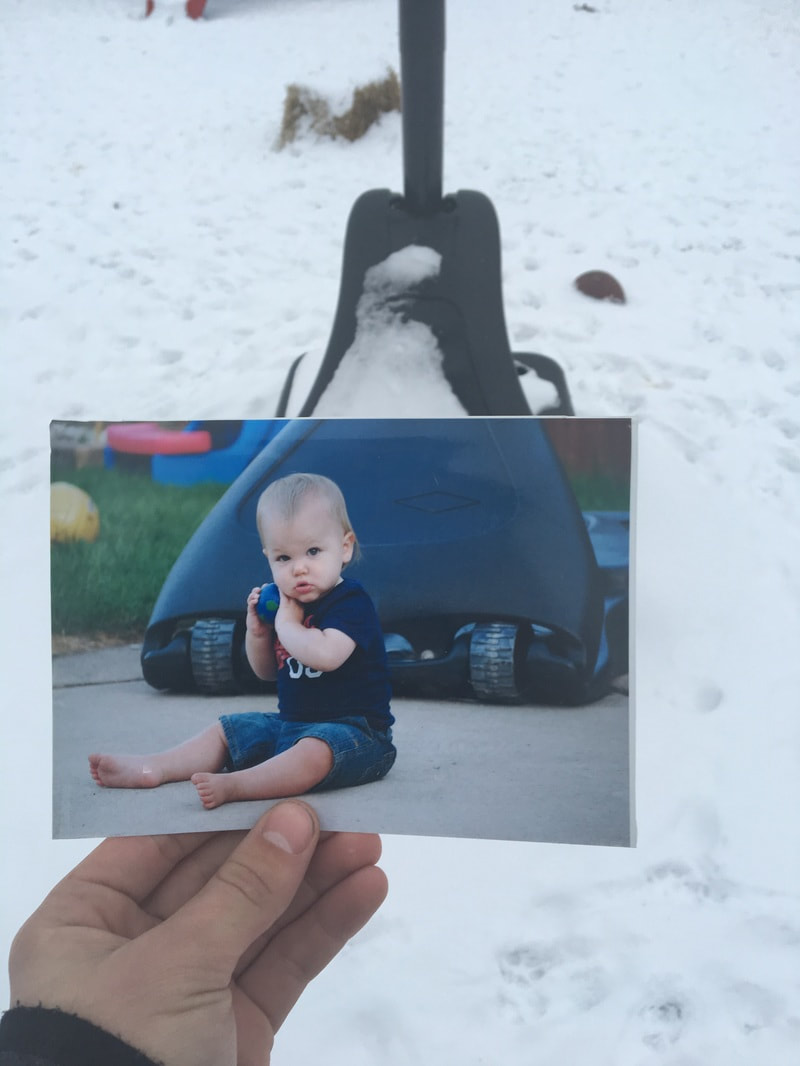
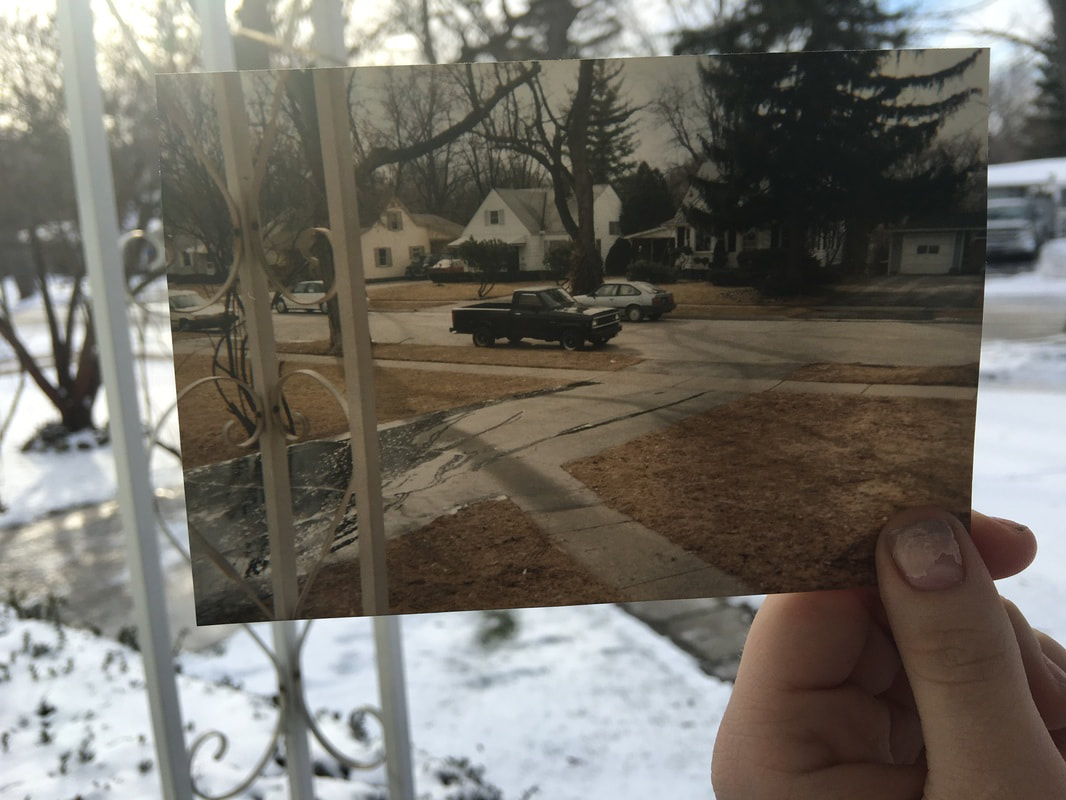
4. *Picture of a Picture- Take a developed photo from an earlier time, position yourself before the same backdrop again and take the picture.
HOMEWORK-
Take a photo of something near your house in the front/back yard from about 10 feet away (car, house, field, road, tree, etc. Or you many find a photo from when you were younger to use for this. This photo will have to be developed. You will take or find this photo now and then we will revisit this photo and take the picture again holding your developed photo around spring time.
There are more examples under the "More" tab.
6. Single Object Project - Focus on a single object. Using point-of-view and the zoom feature of your camera, explore a single object visually. Think abstraction. In viewing your photos, we should still be able to recognize the object. However, surprise us with that different vantage point or ultra-closeup.
Examples:
Flickr- One Object 365 days- Ring
Boat- Several Different Angles
Read these 4 articles and answer the questions provided.
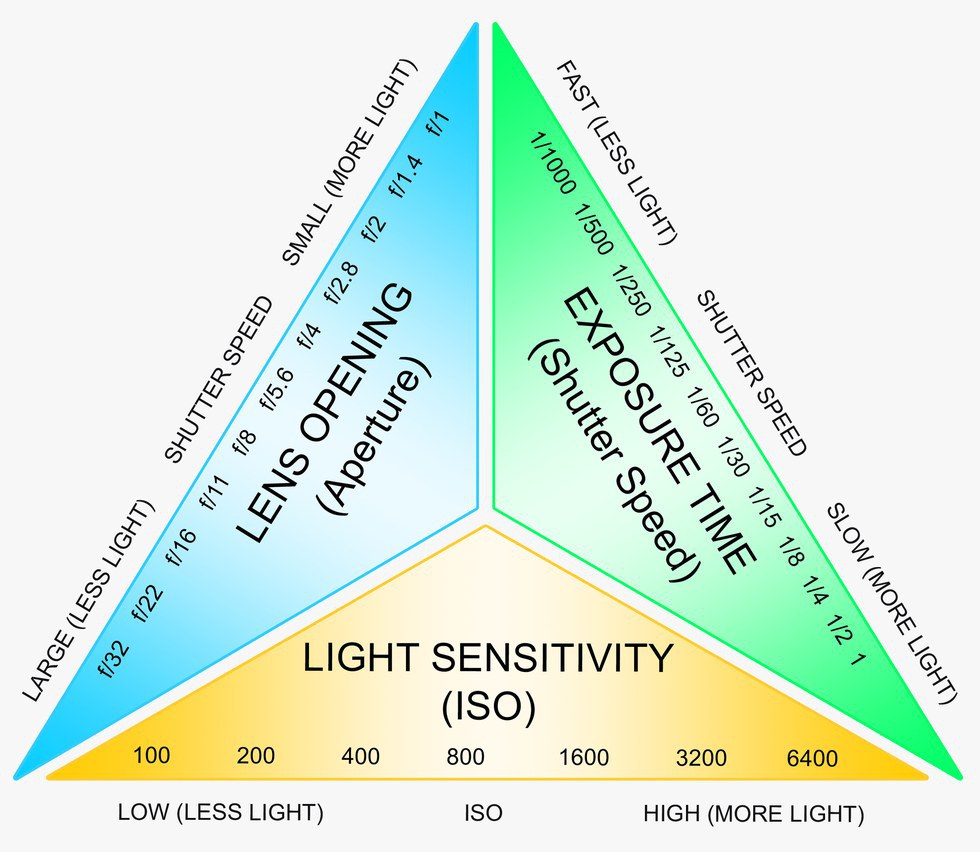
Exposure Triangle Article 1- Describe what the exposure triangle is. What are the 3 parts that make it up? How does each one work?
ISO Article 2-What is ISO? How does the higher/lower ISO affect each shot?
Aperture Article 3- What do the different 'f-stops' mean? What's the difference between f/2.8 & f/22? What does depth of field mean?
Picture with aperture of f/22
The first picture was taken with an aperture of f/22 and the second one was taken with an aperture of f/2.8. The difference is quite obvious. The f/22 picture has both the flower and the bud in focus and you’re able to make out the shape of the fence and leaves in the background.
Picture with aperture of f/2.8
The f/2.8 shot (2nd one) has the left flower in focus (or parts of it) but the depth of field is very shallow and the background is thrown out of focus and the bud to the right of the flower is also less in focus due to it being slightly further away from the camera when the shot was taken.
Shutter Speed Article 4-What do the different numbers mean? When is it best to use fast/slow shutter speed?
------------
Video
Aperture, Shutter Speed, ISO, & Light Explained
Examples:
Flickr- One Object 365 days- Ring
Boat- Several Different Angles
Read these 4 articles and answer the questions provided.
Exposure Triangle Article 1- Describe what the exposure triangle is. What are the 3 parts that make it up? How does each one work?
ISO Article 2-What is ISO? How does the higher/lower ISO affect each shot?
Aperture Article 3- What do the different 'f-stops' mean? What's the difference between f/2.8 & f/22? What does depth of field mean?
Picture with aperture of f/22
The first picture was taken with an aperture of f/22 and the second one was taken with an aperture of f/2.8. The difference is quite obvious. The f/22 picture has both the flower and the bud in focus and you’re able to make out the shape of the fence and leaves in the background.
Picture with aperture of f/2.8
The f/2.8 shot (2nd one) has the left flower in focus (or parts of it) but the depth of field is very shallow and the background is thrown out of focus and the bud to the right of the flower is also less in focus due to it being slightly further away from the camera when the shot was taken.
Shutter Speed Article 4-What do the different numbers mean? When is it best to use fast/slow shutter speed?
------------
Video
Aperture, Shutter Speed, ISO, & Light Explained
Due:
7. Show Your Knowledge
For this assignment you will use the camera simulator by clicking on the button below. The site will help you to understand exposure, by experimenting with it. It allows you to select various lighting conditions, ISO, shutter speed, and aperture settings.
Spend some time on the site. After selecting several different combinations of ISO, shutter speed and aperture settings, WRITE AN EXPLANATION OF YOUR FINDINGS, ALONG WITH AT LEAST 3 PICTURES TO HELP SUPPORT YOUR FINDINGS. Place your essay and photos into your google drive folder.
Due:
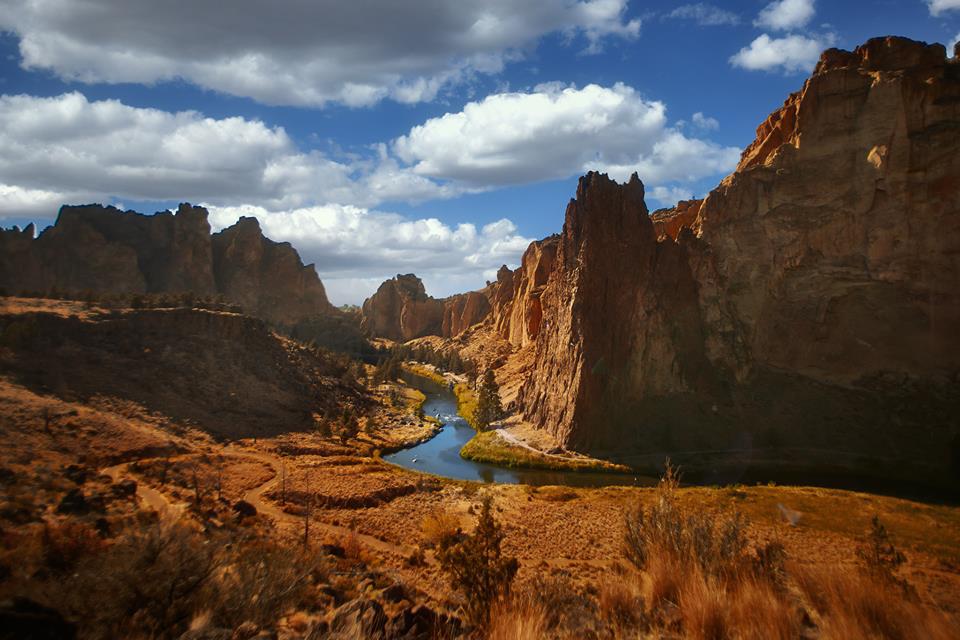
8. Landscapes- Students will take several landscape shots that have a definite point of interest. Remember, landscape shots should be devoid of human influence, instead featuring subjects such as strongly defined landforms, weather, and ambient light.
There will be a total of 10 different landscape shots taken. Be sure to apply the tips/techniques to your photos.
On your weebly page please label where each of your photos were shot. At the very bottom label which shot is your favorite and what makes it so special.
BEFORE you take your photos Read the following article and take notes about the different landscape tips:
Landscape photography tips
1. Have a point of interest and think about placing it according to the rule of thirds.
2. Don't place your horizon across the middle of the scene. A third of the way from the top or bottom is best.
3. Be aware of foreground interest.
4. Consider using framing in your shot if appropriate.
5. Where should you focus? Read this.
6. In most good landscapes, your eye will travel easily around the image. Having a main point of interest and some secondary ones that support the primary subject can add up to a pleasing shot.
Video- Landscape Tips
Video 2- Landscape
Due:
TAKE IT OUTSIDE PHOTO CONTEST- Everybody will submit at least ONE photo to this contest in a selected Nature category. It is preferred to enter one photo for each Nature category. Photos for this contest must be taken in Southeastern Michigan.
WHAT? We are looking for photos taken in Southeastern Michigan that inspire us to appreciate and steward our environment: the air, water, land, resources, wildlife, and ecosystems. Students may choose any of the three categories with a maximum of 1 photo per category. Entry categories are:
Entry Categories are:
Color Tour
Nature's Magic
Prey & Predators
Contest opens October 1st, 2018
Deadline for the contest: Thursday May 9th, 2019
*Contest is limited to one entry per category. Total, 3 per student
PRIZES
$100 Grand Prize
$50 First place for EACH category
$40 Second Place for EACH category
$25 Third Place for EACH category
*Open up your email, cut and paste the following information and fill out. Once completed attach your picture and email to
Enter at www.ginlc.org
Click on "Photo Contest" for entry form
CC: [email protected]
2019-2020 GINLC Photo Contest Entry Form
Last Name:
First Name:
School:
Email Address:
Photo Title:
Category (Select one):
Location of the Photo:
Phone (Optional):
X- I give the GINLC permission to publish this photograph
9. Night Photography- No photographer’s portfolio is complete without a great night shot. Find an interesting location to record a night scene. Consider places with street lights, neon signs, moving cars so you can record light trails, etc. Set your camera to “night mode” (typically symbolized by a crescent moon shape) and turn off your flash for best results. No flash because there is no surfaces for the flash to “bounce” off and reflect back into the scene.
With many night photography subjects, total darkness at night isn’t necessarily the best time to actually do ‘night shots’. Late dusk is usually the preferred time. This is when there is just a bit of light left in the sky after sunset or before sunrise for the early rising photographer.
The advantage of shooting at this time is less large areas of black in the image, this cuts down on excessive contrast and adds more color to the image. The residual daylight that is left will also ‘fill in’ the large shaded areas that are not lit by artificial lighting.
Students will take a total of 15 shots.
Read the articles below and take notes on them. FIVE pieces of useful information from EACH.
Also on this same page, jot down several locations where you might shoot.
Night Photography Tips
Night Cityscapes
Better Night Shots
Examples of Night Photography
60 Examples of Night Photography
100 Examples of Night Photography
Extra Credit
Using your Night pictures, combine them with other pictures YOU have taken.
Using your Night pictures, combine them with other pictures off the Internet.
Pick your best Night picture and alter the color of it. Don't add any other photos to this one, just play with the colors of it.
PHOTOSHOP PROJECT
-FIVE Photoshopped photos combining any two pictures you have taken
-SIX Night Photoshopped photos
My Example
Original
Photoshopped
Also check out the following video:
Quick Selection Tutorial Video
Due:
My "Photoshop two photos" example
Click on the button below to watch a sample video on how to combine two of your own photos.
Click on the button below to watch a sample video on how to combine two of your own photos.

|
+
|

|
=
|

|
9. Architectural Photography- Students will take several photographs of architecture. Architecture is a broad subject, encompassing everything from skyscrapers to shacks. Think buildings (both interior and exterior), bridges, monuments, statues, etc. Virtually everywhere we go, we are surrounded by some sort of architecture on a daily basis. Because of this, it should come as no surprise that architecture is such a popular subject in photography.
Architectural photographs are generally in focus and have a long depth of field. Take into consideration not just the subject itself, but how that subject affects its surroundings as well.
There will be a total of 15 taken. Be sure to apply the tips/techniques to your photos.
Read the following articles and answer the questions provided.
9 Architectural Photography Tips - Monday
A Guide to Architectural Photography -Tuesday
Architectural Photography Basics - Wednesday
Photographing Exterior Details - Thursday
----------------
Examples of architectural photography:
How to Photograph Architecture
Michigan Central Station- Examples of architectural photography from Detroit
Take a look at some examples of my architectural photos.
PHOTOSHOP, extra credit
Choose your best architectural photo and Photoshop it FIVE different ways. Put these on your Weebly page.
Check out the following VIDEO TUTORIAL on how to change colors of an object.
My Example
Original
Photoshopped
Also check out the following video:
Quick Selection Tutorial Video
Choose your best architectural photo and Photoshop it FIVE different ways. Put these on your Weebly page.
Check out the following VIDEO TUTORIAL on how to change colors of an object.
My Example
Original
Photoshopped
Also check out the following video:
Quick Selection Tutorial Video
Due:
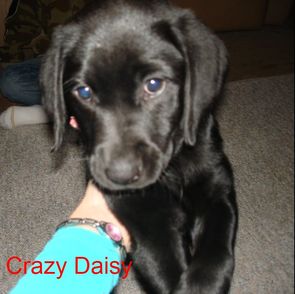
10. Pet Photography - Students will take a series of pet photos after researching pet photography tips and techniques, as well as reading the articles provided below,.
Students need a total of FIFTEEN shots.
Use Treats. Just grab your pets favorite treat (or toy) and hold it directly above or beside your lens.
Use Props. Work with what you have and try different props until something works.
Dress them up.
Use window light, no flash.
Check out the articles and examples below for inspiration.
Part 1: Read the first TWO articles below and take notes on them. Also on this same page, write down what pet will be the subject for your photos.
Pet Photography Tips
How to Photograph Pets
How to take best Pet Photos
Examples Pet Photography
38 Amazing Pet Photos
Part 2: Pet Photoshop
1. Pick a picture of your pet that YOU took and combine it with another picture that YOU took using Photoshop. Create 5 Photoshop pictures following this format.
2. Pick a picture of your pet that YOU took and add it to a picture that you got off the internet. Create 5 Photoshop pictures following this format.
Due:
11. Food photography challenge - Students will take a series of digital food photos, from breakfast to dinner, pre-made snacks to homemade goodies. Take photographs of food which will make our mouths water and our stomachs growl. Students need a total of FIFTEEN shots. The shots need to showcase the food in the most APPEALING light.
*The food photo should focus ON the subject and not get lost by "background noise".
*On a Word document decide what food subjects you will use for your photos. Come up with at least 10 for now.
Read the first TWO articles (#1 & #2) below and take notes on them.
Youtube Videos
McDonald's Burger Photo Shoot Video
Food Photo Shoot w/ Camera Phone
Jamie Oliver Food Photography
Food Photography
#1-Food Photography Introduction
#2-Food Photography Techniques & Tips
#3-10 Food Photography Tips
#4-11 Angles- Food Photography
#5-10 Tips for Food Styling
Notes on all 5 articles above are due by Friday. Please put them all on the same Word document and put them into Dropbox.
25 Examples of Food Photography
Food Photography Inspiration
12. Color Photography Challenge
Students will select a color and shoot with that color in mind. Find your color outdoors and indoors. By the end of the project, students should be surprised how that color jumps out.
For outdoor shots, think about your neighborhood, parks, yards, etc.
For indoor shots, think about your school, house, restaurants, stores, etc.
Remember to get rid of “background noise” in your pictures. Focus specifically on your color. Be creative with your shots.
A total of TEN photos will be taken.
Color Red- Examples
Color Yellow- Examples
Color Blue- Examples
Due:
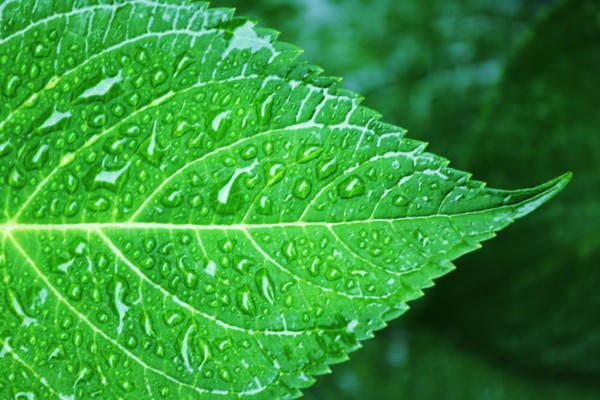
13. Water... In all its forms
Capture 10 different examples of water. Water is such a brilliant thing for photographers: It's reflective, it forms patterns on its surface, it's present in rural and urban environments and it can be captured to good effect on either a fast or slow shutter speed.
The idea of this project is to look at water in as many different ways as possible. You could photograph water in: rivers, seas, pools, puddles, taps, icicles, bottles, baths, etc. Think of scenes where water may seem misty, peaceful, or breathtaking.
Explore the way it moves when running, pouring and trickling. Look at how it forms into tiny droplets and jewel-like beads. Capture it in any form you see fit.
Water Photo- Metro Park
Water Drops Article 2
Water with Landscape Article 3
Due:
11. Photojournalism: Our School in Pictures - After learning about photojournalism and narrating a story through pictures, students seek to describe their school in a series of photojournalist images, telling various hidden stories and highlighting never-before-seen scenes in this challenging photography lesson.
Flat Rock High School has special meaning to you all, whether you want to admit it or not. People will ask you 10 years from now, "What high school did you go to?" What will you remember about your time here?
For this project, take a minimum of FIFTEEN photos from Flat Rock High School that help tell YOUR story. Think of people, places, and things in school that are memorable to you. Think about when you get back together with your friends 20 years from now, what are some things that you will remember about this place. Capture those images forever.
*Complete the notes on photojournalism and think about the people, places, things here at Flat Rock you will shoot.
Telling Stories with Photos
Good Captions in Photojournalism
This Will count as your final Project in the grade book, THAT MEANS THAT IT IS WORTH MORE.
SENIORS, this will be your final project. Everyone else, we still have a couple more projects.
DUE:
